-
-

The components of the Tensorflow environment I used.
-

The custom model I built and it's proposal for a residual block containing convolutions.
-

The model was trained with Google Colab using GPUs, and a confusion matrix after only 10 epochs.
-

About the public dataset I used with the Kaggle API.
-

The structure of the hardware used for tflite serving and real-tiem streaming after quantization and deployment.
-

Screenshots of the web platform with the technologies used.


![]()
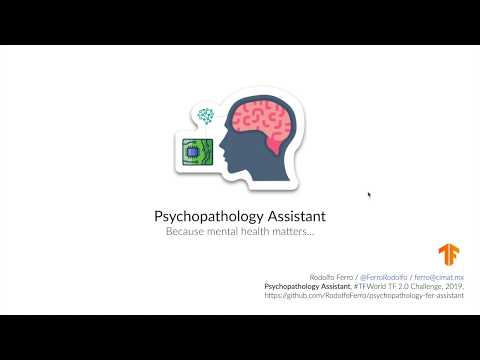
Psychopathology Assistant
Because mental health matters.
View the demo »
Table of Contents
What it does
An intelligent assistant platform to track psychopathology patients' responses during face-to-face and remote sessions.
This platform makes use of a machine learning algorithm capable of tracking and detecting facial expressions to identify associated emotions through a camera. This allows the corresponding medical staff to take care of their patients by creating medical records supported by the artificially intelligent system, so they can follow-up the corresponding treatments.
Inspiration
Some facts:
- Anxiety disorders, Mood disorders, Schizophrenia and psychotic disorders, Dementia...
- Over 50 percent of all people who die by suicide suffer from major depression
- Most of these disorders are treated primarily through medications and psychotherapy THIS IS THE MAIN REASON OF THE PLATFORM AS A COMPLEMENTARY SOLUTION
- As you may have had, I have had depression and I can only ask to my self "what are we doing to help others avoid or decrease their suffering?"
Mental health is important.
And as I have mentioned, most of these disorders are treated primarily through medications and psychotherapy, and tracking the emotional responses of the patients during psychoterapy sessions may result important as this reveals progress on their treatment. This is why I am trying to help with this AI based platform.
How I built it
This project has been built with a lot of love, motivation to help others and Python, using:
- Tensorflow 2.0

- Google Colab (with its wonderful GPUs)
- Model quantization with
tf.litefor serving - A Raspberry Pi Model 3B+
- A real-time Flask and Dash integration (along with Dash Bootstrap Components)
- A real-time database, of course, from Firebase
- The Kaggle API to get the dataset
Getting Started
To get a local copy up and running follow these simple steps.
Prerequisites
This is an example of how to list things you need to use the software and how to install them. For this particular section I will suppose that you already have git installed on your system.
For a general everview of the Raspberry Pi setup, you can check out my blog tutorial on how to setup your Raspberry Pi Model B as Google Colab (Feb '19) to work with Tensorflow, Keras and OpenCV, as those are the steps that we will follow. In any case, this specific setup can be seen in the corresponding rpi folder.
Installation
- Clone the
psychopathology-fer-assistantrepo:
git clone https://github.com/RodolfoFerro/psychopathology-fer-assistant.git
- Create a virtual environment with Python 3.7. (For this step I will assume that you are able to create a virtual environment with
virtualenvorconda, but in any case you can check Real Python's post about virtual environments.) - Install requirements using
pip:
pip install -r requirements.txt
- You may also need to create your own real-time database on Firebase and set the corresponding configuration variables on the
app/__init__.pyandrpi/main.pyfiles.
Run the dashboard
To run the dashboard you will need to get access to the MongoDB cluster by setting the MONGO_URI variable in the corresponding db file. Once you have done this and have installed the requirements, get the dashboard up and running with:
python run.py
Usage
Data Exploration
The dataset used for this project is the one published in the "Challenges in Representation Learning: Facial Expression Recognition Challenge" by Kaggle. This dataset has been used to train a custom model built with Tensorflow 2.0.
The data consists of 48x48 pixel grayscale images of faces. The faces have been automatically registered so that the face is more or less centered and occupies about the same amount of space in each image. The task is to categorize each face based on the emotion shown in the facial expression in to one of seven categories (0=Angry, 1=Disgust, 2=Fear, 3=Happy, 4=Sad, 5=Surprise, 6=Neutral). A sample of the dataset can be seen in the next image.

If you would like to see the data exploration process, check out the notebook found in the data folder, or click on the following button to open it directly into Google Colab.
![]()
Model Training
After doing some research in the state of the art for Facial Expression Recognition tasks, I found that in "Extended deep neural network for facial emotion recognition (EDNN)" by Deepak Kumar Jaina, Pourya Shamsolmoalib, and Paramjit Sehdev (Elsevier – Pattern Recognition Letters 2019), the proposed model turns out to achieve better results in classification tasks for Facial Expression Recognition, and by the architecture metrics this network turns out to be a more lightweight model compared with others (such as LeNet or Mobile Net).
As part of the project development I have implemented from zero the proposed model using Tensorflow 2.0. For training I used the previously mentioned dataset from the "Challenges in Representation Learning: Facial Expression Recognition Challenge" by Kaggle on a Google Colab environment using GPUs. So far the model was trained for only 12 epochs using a batch size of 64. The training history can be seen in the following graphs:


Although the results may not seem quite good, the model has achieved an accuracy value of 0.4738 on the validation dataset with only 12 training epochs, with a result that could be part of the top 35 scores in the challenge leaderboard. We can get a general idea of the model performance in the confusion matrix:

The trained model architecture and quantized model with tflite (for the deployment in the Raspberry Pi) can be found in the model folder. Finally, if you want to re-train the model and verify the results by your own, or only if you have the curiosity to understand deeper the whole process of building and training the model with detail, check out the notebook found in the same folder, or click on the following button to open it directly into Google Colab.
![]()
UPDATE:
I have trained the same model with a research database (the Radboud Faces Database) obtaining an accuracy of 0.9563 with 50 epochs, a learning rate of 0.00001 and a batch size of 128; after doing some pre-processing and data augmentation. Anyway, due the priacy of the database I won't be able to share more details about this, but in any case PLEASE feel free to reach me at: ferro@cimat.mx
As you may wonder about the results, the training history and the confusion matrix may illustrate more about them:


Web Application
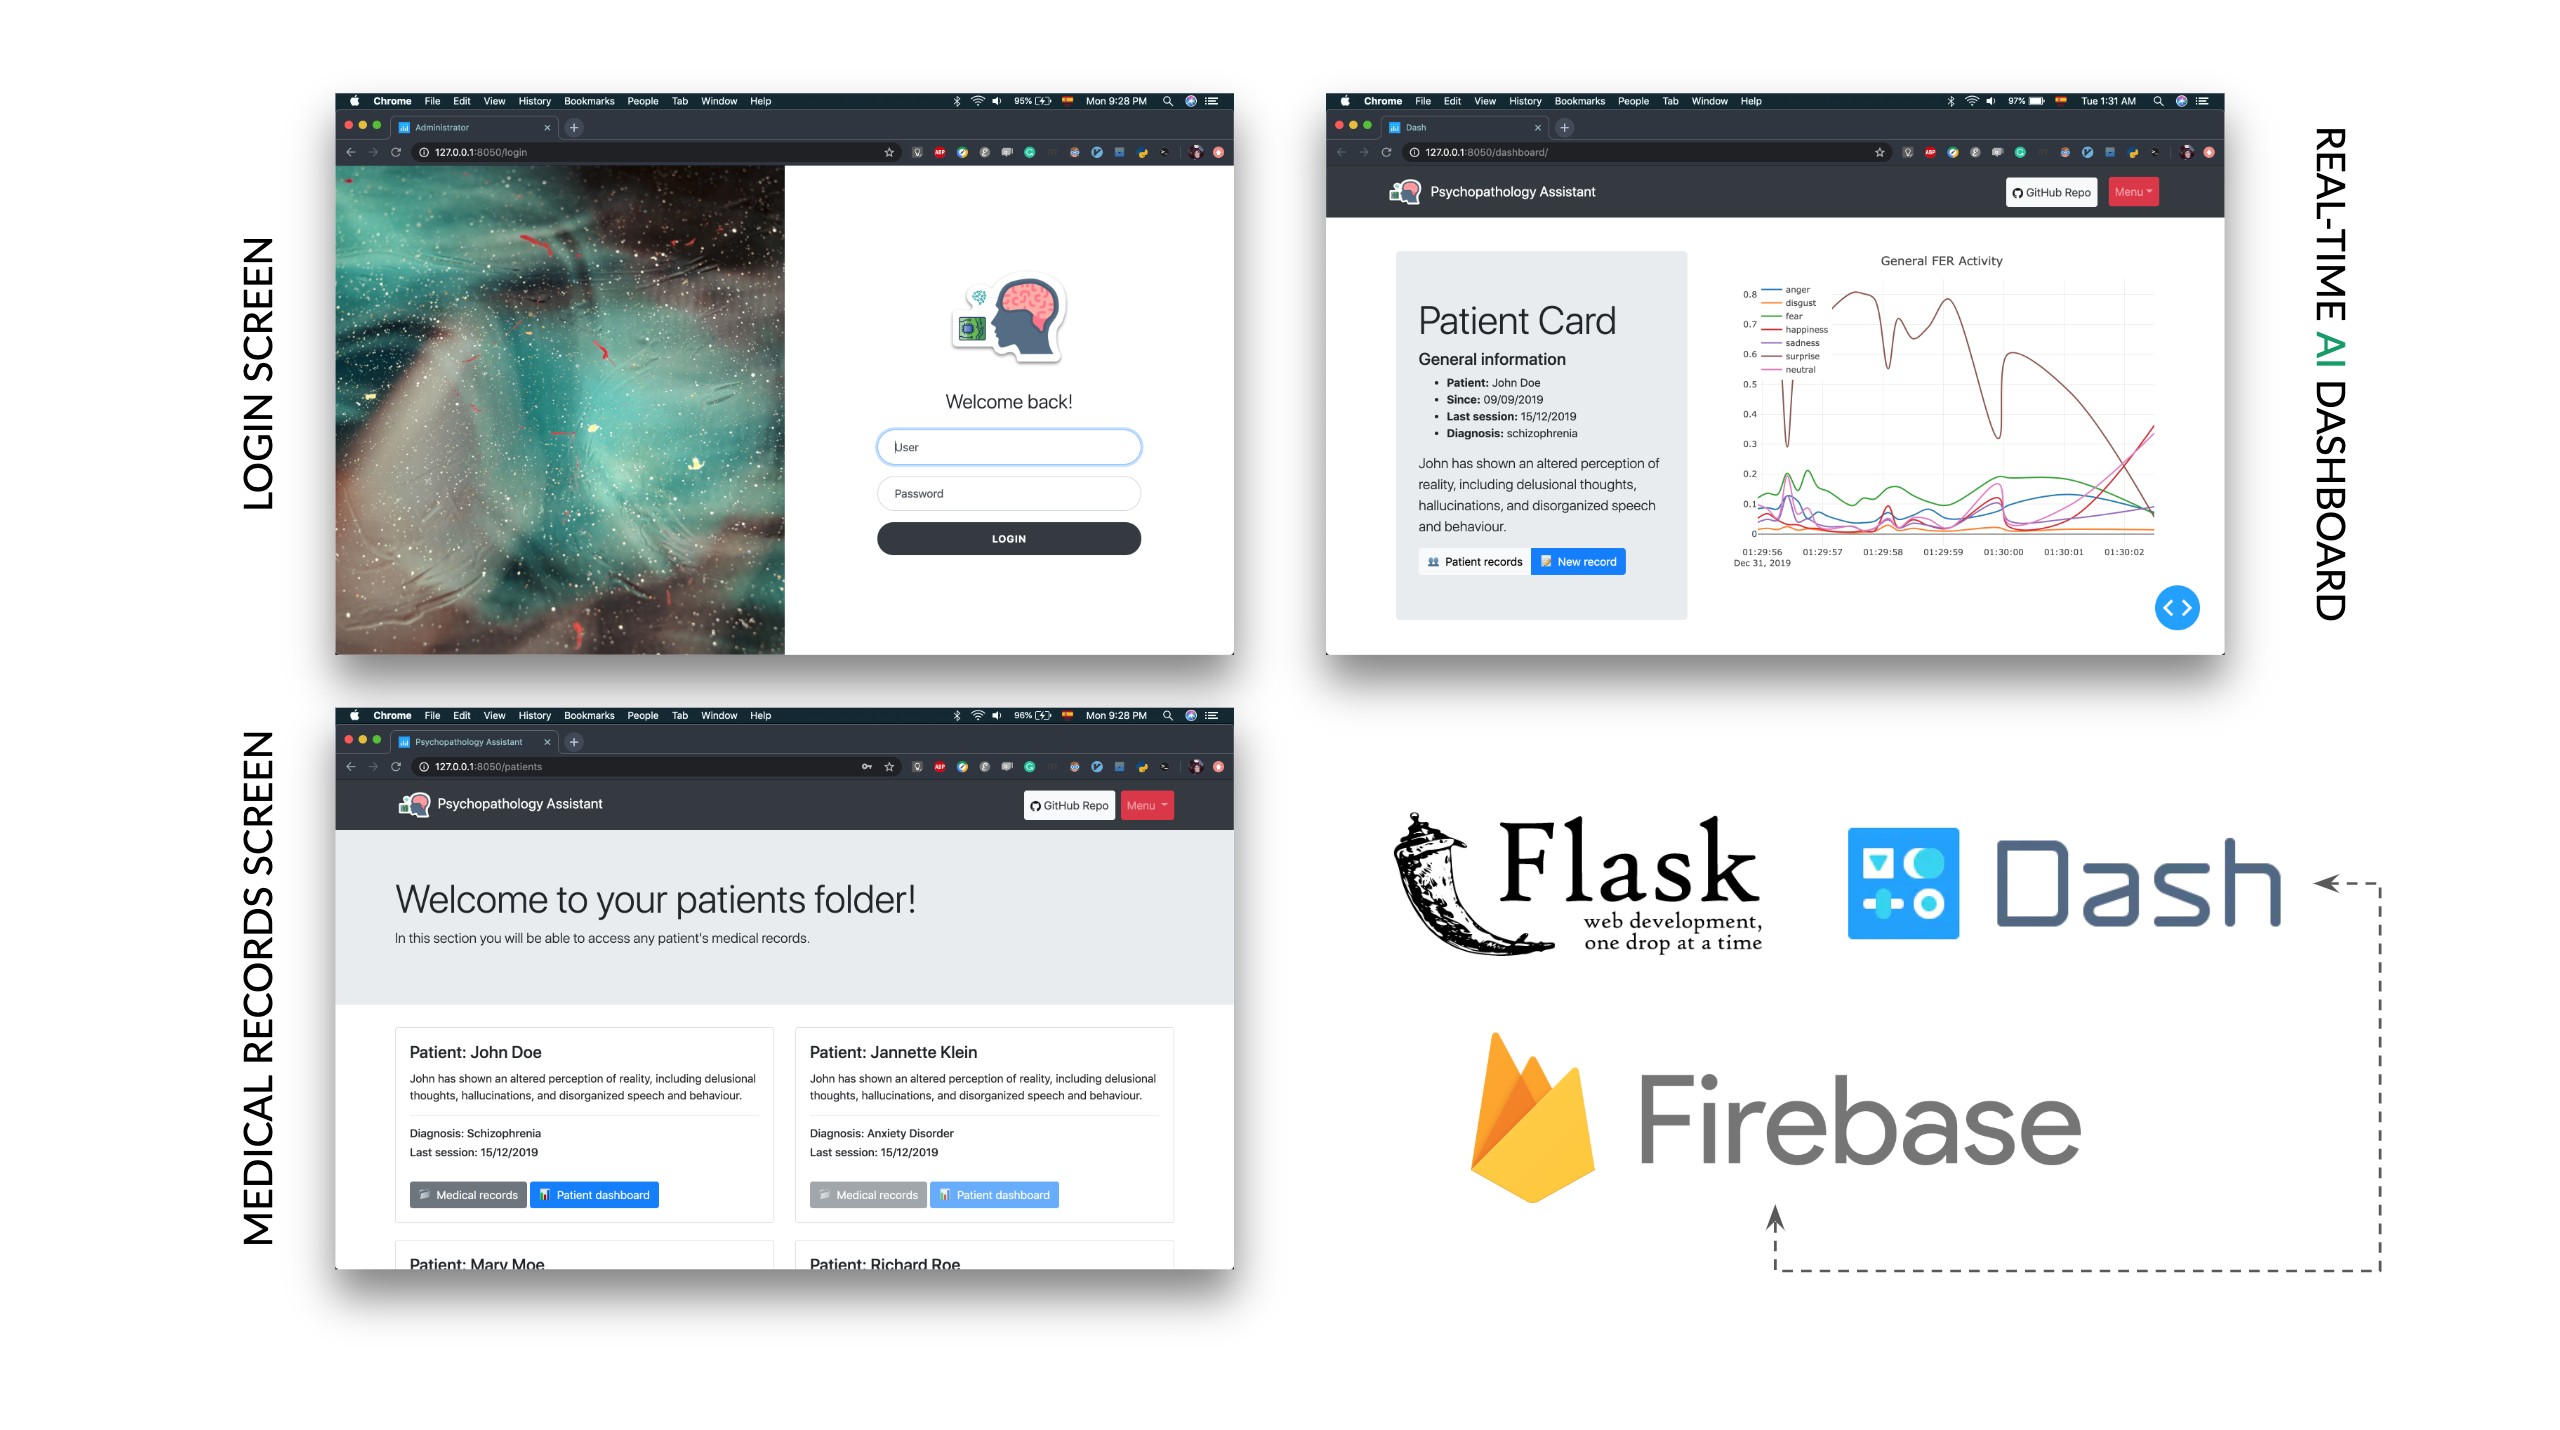
The web application is the base of interaction for the medical staff during the treatment sessions. This web platform aims to integrate a medical record for patients, and a realtime dashboard to make use of the AI power for the FER tasks during sessions.
The platform has been entirely developed with Python on top of a Flask and Dash integration, along with Dash Bootstrap Components for a more intuitive interaction. The platform serves a real-time plot that is served through the trained model that is deployed on de Raspberry Pi, which sends the data in real-time to a real-time database that is Firebase hosted. The platform already includes a login view (user: rodo_ferro, password: admin) to access the dashboard and patients' records.
Model Serving
The following image illustrates a general idea of the model serving on the Raspberry Pi:

Once that the model has been trained, saved, quantized and downloaded, the model has been ported into a Raspberry Pi model 3B+. The Raspberry Pi connects directly to the real-time database in Firebase to send the data as the deployed model predicts.
The script that serves as the interface between the Raspberry Pi and the database is capable of printing metrics of the model performance as well as the device performance during the time the model is serving its results. In general, the served model with tflite takes only ~3% of the Raspberry Pi CPU and the time of prediction is in the range (0.005, 0.015), as you may see in the following example of its output:
 * Time for face 0 det.: 0.0017399787902832031
 * Time for prediction: 0.0062448978424072266
 * Process ID: 50495
 * Memory 2.8620%
 * Emotion: Neutral

 * Time for face 0 det.: 0.0023512840270996094
 * Time for prediction: 0.0059719085693359375
 * Process ID: 50495
 * Memory 2.8629%
 * Emotion: Neutral

 * Time for face 0 det.: 0.0016210079193115234
 * Time for prediction: 0.006102085113525391
 * Process ID: 50495
 * Memory 2.8629%
 * Emotion: Neutral
The complete details on how to setup a Raspberry Pi and how to run the Python script to communicate with Firebase can be found inside the rpi folder.
Challenges I ran into and What I learned
One of the main challenges was to create a real-time dashboard without having much knowledge about web development, my major area of studies is mathematics, and this is why I found that Dash along with Flask may result in the most suitable technologies to tackle this area of necessity. The second main challenge (once I learned about creating the dashboard) was to create a real-time streaming service to save the data gathered by the deployed model. The solution was to integrate a Firebase real-time database and then connect the dashboard with the same database, so it could get updated in real-time. Finally, this is the first time I serve a trained model using tflite on a Raspberry Pi, and the Raspberry Pi for an outdated version was a struggle.
At the end, I learned that whenever you may think that you found no way out, the motivation may help you to find alternative solutions with new technologies.
Accomplishments that I'm proud of
- Building a custom model from a paper proposal
- Serving the model on a Raspberry Pi using tflite
- Sending real-time predictions to a real-time dashboard
- Learning new technologies in a record time
- Start creating a platform that will help others
What's next for Psychopathology Assistant
- Develop own embedded device for the model deployment (which should already include a camera)
- Improve user data aquisition through the real-time service
- Add medical recording to database
- Implement patients' medical records analytics
- Add security metrics for medical records
- Test prototype with a psychologist/psychiatrist
Contact
Rodolfo Ferro - @FerroRodolfo - rodolfoferroperez@gmail.com
Project Link: https://github.com/RodolfoFerro/psychopathology-fer-assistant
IF YOU THINK THAT YOU CAN HELP ME TO HELP OTHERS, PLEASE DO NOT HESITATE TO CONTACT ME.
Acknowledgements
- Icons made by Smashicons from www.flaticon.com
- Icons made by Flat Icons from www.flaticon.com
- Icons made by Becris from www.flaticon.com


Log in or sign up for Devpost to join the conversation.